Showing posts with label Rescue Beauty Lounge. Show all posts
Showing posts with label Rescue Beauty Lounge. Show all posts
Rescue Beauty Lounge Concrete Jungle
Hellooooooo ladies! I haven't been in the mood to blog lately so it was nice to take a little break. I have WAY too much stuff on my plate at the moment and my time management after work is just not happening! But I'm starting to get my mojo back slowly so I have some quick swatches for you of an oldie but a goodie - Rescue Beauty Lounge Concrete Jungle. It's my absolute favourite grey!!!! Unfortunately it's no longer available and I don't think it's ever been brought back sadly =(
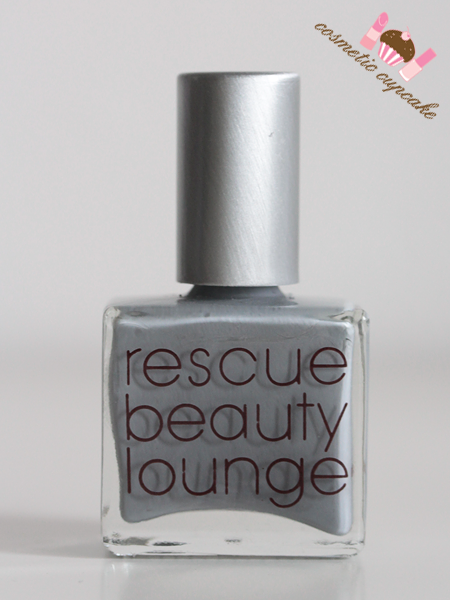
Concrete Jungle is a soft dove grey creme. It's so versatile and like other RBL's the formula is just perfection even after owning it for so many years. 2 coats is pictured.
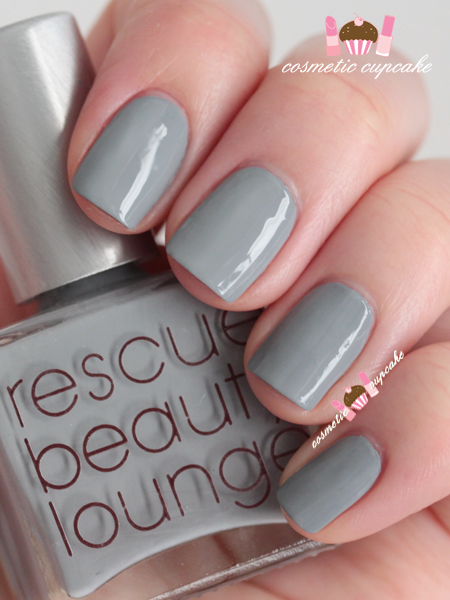
Close up:
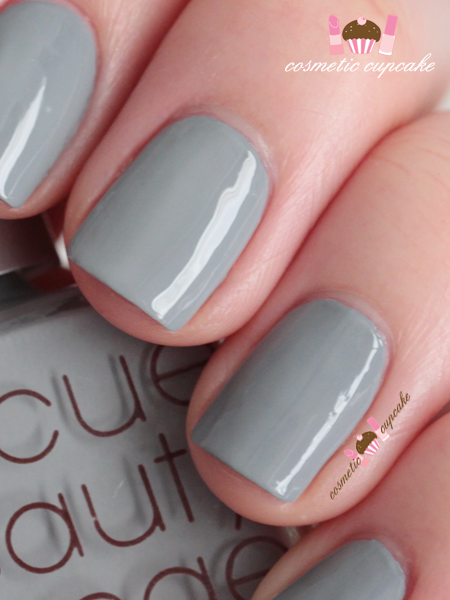

I seriously need to add to my RBL collection! I hope you've all been well and thanks for looking as always =)
Concrete Jungle is a soft dove grey creme. It's so versatile and like other RBL's the formula is just perfection even after owning it for so many years. 2 coats is pictured.
Close up:
I seriously need to add to my RBL collection! I hope you've all been well and thanks for looking as always =)
Halloween drip manicure
I've been so uninspired lately. October is usually a great month because there's pink and Halloween manis to do but I haven't been in the mood to try out anything doh. I did manage to do a quick Halloween drip mani the other day though which I always love doing and always work!!

For my pinky I used 2 coats of Rescue Beauty Lounge Concrete Jungle and dripped essence You've Got the Art; for my ring finger I used 1 coat of Kester Black Cherry Pie* and Cult Nails Nevermore for the drips; for my middle finger I used 2 coats of China Glaze Roguish Red and China Glaze Happy Go Lucky for the drips and for my index finger I used 2 coats of Sinful Colors Mint Apple and China Glaze Grape Pop for the drips.

For my thumb I used 2 coats of OPI Alpine Snow and Kester Black Cherry Pie* for the drips. I think my fave colour combo is my pinky as it looks like slime!


What do you do when you're uninspired? I hate being in a rut and it seems to always happen!
For my pinky I used 2 coats of Rescue Beauty Lounge Concrete Jungle and dripped essence You've Got the Art; for my ring finger I used 1 coat of Kester Black Cherry Pie* and Cult Nails Nevermore for the drips; for my middle finger I used 2 coats of China Glaze Roguish Red and China Glaze Happy Go Lucky for the drips and for my index finger I used 2 coats of Sinful Colors Mint Apple and China Glaze Grape Pop for the drips.
For my thumb I used 2 coats of OPI Alpine Snow and Kester Black Cherry Pie* for the drips. I think my fave colour combo is my pinky as it looks like slime!
What do you do when you're uninspired? I hate being in a rut and it seems to always happen!
* Product(s) provided to me for consideration but this in no way influenced my review in any way. As always, my reviews are my 100% honest opinion. My Disclosure Policy can be viewed here.
Snow White and the Huntsman manicure
Happy Monday ladies! I hope you've all had a good start to the week =) Yesterday I watched Snow White and the Huntsman with 2 of my lovely girlfriends so I thought I would do a Snow White inspired mani. But it was a massive fail because I didn't know what I wanted to do for each nail and I don't think it gelled properly! ARGH. I hate when that happens. My photos suck as well because my heart wasn't into this mani doh.
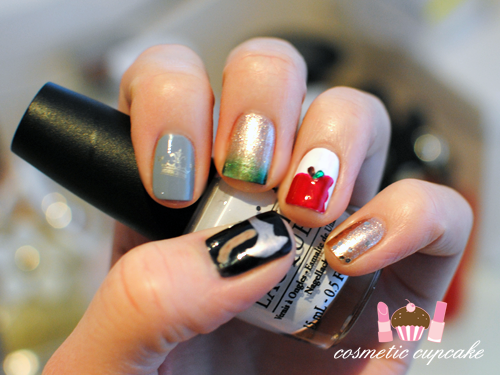
What I used:

Pinky: I used 2 coats of BYS Astro Gold and 2 coats of Sephora by OPI Only Gold for Me top coat.
Ring finger: I used 2 coats of OPI Alpine Snow and used a small brush to freehand the bitten apple using China Glaze Phat Santa, Ulta 3 chocolate cake for the leaf and a green rhinestone for the apple.
Middle finger: I took inspiration from this movie poster and created a gradient nail using BYS Astro Gold, Tom Ford Silver Smoke and China Glaze Jolly Holly.
Index finger: I used 1 coat of Rescue Beauty Lounge Concrete Jungle and stamped the gold crown image from Bundle Monster plate BM08 using China Glaze Passion.

Thumb: I used 2 coats of Glitter Gal Serpent Black* as a black base. For the axe I used a small brush to freehand using China Glaze Devotion for the blade and Essie Brooch the Subject* for the handle with Essie Hot Coco* for the darker wood accents.

I instagrammed this pic on Saturday night halfway through my mani and I thought I'd post it here too xp I like to have everything in reach when I'm doing my mani so my supplies take up about 1/3 of my desk. My routine is to turn on a good DVD and relax while doing my mani!

Have you seen Snow White and the Huntsman? I really enjoyed it and Kirsten Stewart didn't annoy me as much as I thought she would lol. Lots of decent action scenes and a bit of eye candy too!
Thanks for looking as always =)
* Product(s) provided to me for consideration but this in no way influenced my review in any way. As always, my reviews are my 100% honest opinion. My Disclosure Policy can be viewed here.
What I used:
Pinky: I used 2 coats of BYS Astro Gold and 2 coats of Sephora by OPI Only Gold for Me top coat.
Ring finger: I used 2 coats of OPI Alpine Snow and used a small brush to freehand the bitten apple using China Glaze Phat Santa, Ulta 3 chocolate cake for the leaf and a green rhinestone for the apple.
Middle finger: I took inspiration from this movie poster and created a gradient nail using BYS Astro Gold, Tom Ford Silver Smoke and China Glaze Jolly Holly.
Index finger: I used 1 coat of Rescue Beauty Lounge Concrete Jungle and stamped the gold crown image from Bundle Monster plate BM08 using China Glaze Passion.
Thumb: I used 2 coats of Glitter Gal Serpent Black* as a black base. For the axe I used a small brush to freehand using China Glaze Devotion for the blade and Essie Brooch the Subject* for the handle with Essie Hot Coco* for the darker wood accents.
I instagrammed this pic on Saturday night halfway through my mani and I thought I'd post it here too xp I like to have everything in reach when I'm doing my mani so my supplies take up about 1/3 of my desk. My routine is to turn on a good DVD and relax while doing my mani!
Have you seen Snow White and the Huntsman? I really enjoyed it and Kirsten Stewart didn't annoy me as much as I thought she would lol. Lots of decent action scenes and a bit of eye candy too!
Thanks for looking as always =)
* Product(s) provided to me for consideration but this in no way influenced my review in any way. As always, my reviews are my 100% honest opinion. My Disclosure Policy can be viewed here.
Lynnderella Gotta Love Brains
Yes I've been MIA again. It seems like I've bitten off more than I can chew just at the moment and I'm not really in the mood to blog much either! Oh well. I have a quick swatch today of another gorgeous Lynnderella polish - Gotta Love Brains. I really liked the look of the swatches I saw online and I'm happy that it doesn't disappoint in real life! Love the name too xp
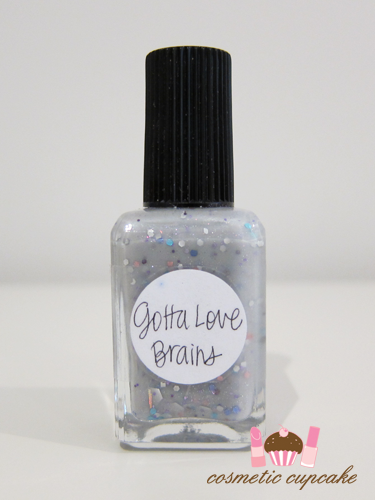
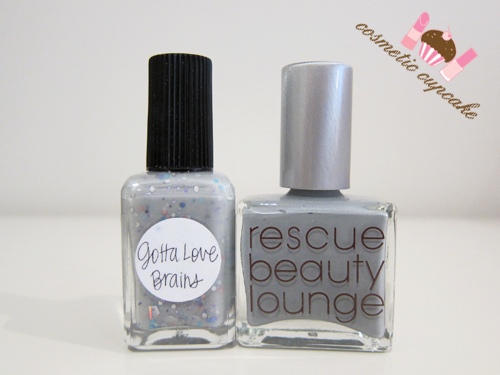
Gotta Love Brains is made up of small silver, blue and purple hex glitters; silver and pink square glitter; silver bar glitter and larger hex glitters all in a milky grey base with subtle purple and silver shimmer. I used 3 coats over 1 coat of Rescue Beauty Lounge Concrete Jungle (which is an awesome opaque grey by itself already) for this NOTD.
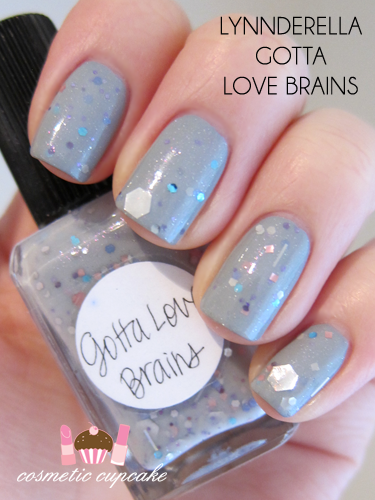
Close up:
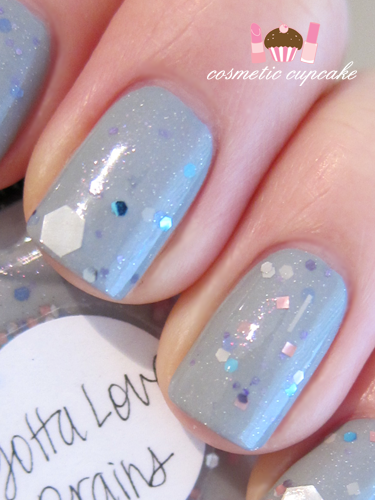
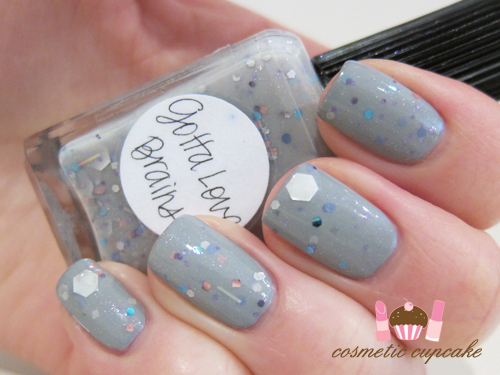
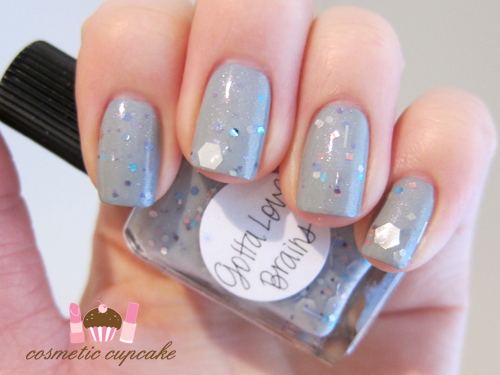
Concrete Jungle a bit darker in real life - unfortunately my camera washed the colour out a bit. I love this combo!
To order Lynnderella polishes: They are only available via wish list. Sign up for email alerts on http://shop.llarowe.com to be sent a wish list when they accept them again!
Hope you've all been well. Thanks for looking as always =)
Gotta Love Brains is made up of small silver, blue and purple hex glitters; silver and pink square glitter; silver bar glitter and larger hex glitters all in a milky grey base with subtle purple and silver shimmer. I used 3 coats over 1 coat of Rescue Beauty Lounge Concrete Jungle (which is an awesome opaque grey by itself already) for this NOTD.
Close up:
Concrete Jungle a bit darker in real life - unfortunately my camera washed the colour out a bit. I love this combo!
To order Lynnderella polishes: They are only available via wish list. Sign up for email alerts on http://shop.llarowe.com to be sent a wish list when they accept them again!
Hope you've all been well. Thanks for looking as always =)
Rescue Beauty Lounge Scrangie
Last year I splurged and finally bought myself the beautiful Rescue Beauty Lounge Scrangie created by one of my favourite nail bloggers Scrangie. I was so disapppointed that it was discontinued but I nearly passed out when it was brought back!! xD
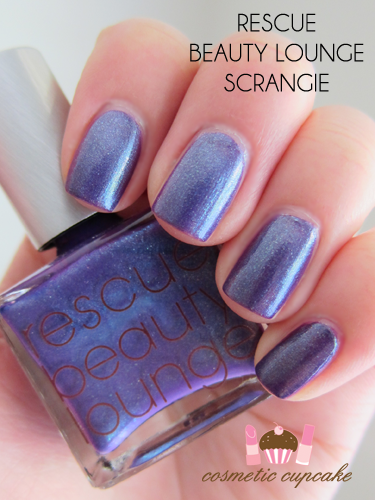
Scrangie is described as a "medium blue-based purple with green iridescence and green microshimmer". Scrangie combined her two favourite polish colours purple and green to create a colour that mimics the colours of a beetles wing. It is SO beautiful! The shimmer is just amazing!
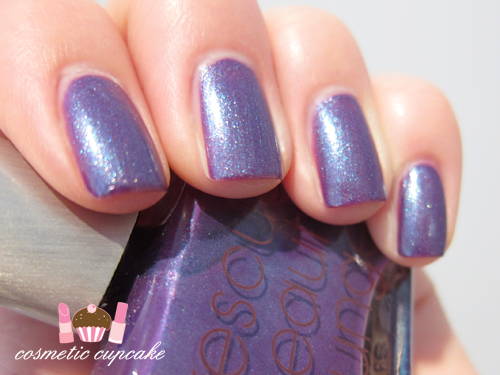
The formula is on the sheer side so I use 3 coats for opacity. It applies a little unevenly so I get some balding but a thicker final coat usually does the trick. I'm not huge fan of the Rescue Beauty Lounge brushes as they're a little too flexible for me. I prefer my brushes to be firmer to give me better control of the polish but that's just my personal preference ;) It still applies OK but I find I always have to do some cleanup.
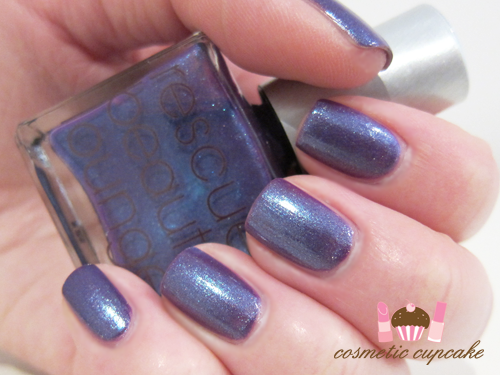
I've worn it a quite a few times now but I'm not sure the colour really suits me sadly.. but it's a must have so I'm still going to rock it haha. You can actually purchase Scrangie now as part of Rescue Beauty Lounges Bring It Back colours! It sells for $18US which is on the pricey end of the polish scale but oh so worth it!
Have a great weekend ladies!
Scrangie is described as a "medium blue-based purple with green iridescence and green microshimmer". Scrangie combined her two favourite polish colours purple and green to create a colour that mimics the colours of a beetles wing. It is SO beautiful! The shimmer is just amazing!
The formula is on the sheer side so I use 3 coats for opacity. It applies a little unevenly so I get some balding but a thicker final coat usually does the trick. I'm not huge fan of the Rescue Beauty Lounge brushes as they're a little too flexible for me. I prefer my brushes to be firmer to give me better control of the polish but that's just my personal preference ;) It still applies OK but I find I always have to do some cleanup.
I've worn it a quite a few times now but I'm not sure the colour really suits me sadly.. but it's a must have so I'm still going to rock it haha. You can actually purchase Scrangie now as part of Rescue Beauty Lounges Bring It Back colours! It sells for $18US which is on the pricey end of the polish scale but oh so worth it!
Have a great weekend ladies!
Illamasqua Wink NOTD
Hi ladies! How has your weekend been? Mine was far too short as usual and I'm dreading going back to work tomorrow. I didn't get much time to do my nails but I managed to squeeze in a quick NOTD using the gorgeous Illamasqua Wink which I hauled in January.
Illamasqua Wink is a beautiful pale lavender creme and just the type of pastel colour I adore! These bottles are so sexy and square and how I long to own more as they would look fantastic all lined up in my helmer =p

It applied smoothly and was opaque in just 2 coats which is fantastic. For pastels I find I need at least 3 coats for opacity and to even out the streakiness so I'm very happy. I'm used to using polishes with round caps that it took me a little while to get used to the square cap!

I felt like some glitter but I didn't want to cover up the gorgeous colour so I attempted a glitter gradient with Rescue Beauty Lounge Frugalista. I really should have sponged it but oh well!

I'm currently still tallying up entries for my giveaway and the winner will be announced as soon I can. I'll be catching up with comments too shortly! I've just been so busy lately running around trying to get everything done. I really need more than 1 day off in a week but alas it's self inflicted!
I hope you're all having a great weekend! Do you have any Illamasqua polishes? What's your favourite colour from their range?
Thanks for looking as always!
Illamasqua Wink is a beautiful pale lavender creme and just the type of pastel colour I adore! These bottles are so sexy and square and how I long to own more as they would look fantastic all lined up in my helmer =p
It applied smoothly and was opaque in just 2 coats which is fantastic. For pastels I find I need at least 3 coats for opacity and to even out the streakiness so I'm very happy. I'm used to using polishes with round caps that it took me a little while to get used to the square cap!
I felt like some glitter but I didn't want to cover up the gorgeous colour so I attempted a glitter gradient with Rescue Beauty Lounge Frugalista. I really should have sponged it but oh well!
I'm currently still tallying up entries for my giveaway and the winner will be announced as soon I can. I'll be catching up with comments too shortly! I've just been so busy lately running around trying to get everything done. I really need more than 1 day off in a week but alas it's self inflicted!
I hope you're all having a great weekend! Do you have any Illamasqua polishes? What's your favourite colour from their range?
Thanks for looking as always!
Cosmetic Cupcake manicure
Thank you so much for the well wishes and overwhelming response to my Birthday Giveaway! You guys rock! Just a quick post tonight to show you my celebration manicure to celebrate my 1st blog birthday. Yes I am corny like that and use any excuse to celebrate with a mani OK! I've wanted to do a cupcake manicure for a very long time now but I decided to save it for this blog milestone =D Here is my Cosmetic Cupcake manicure!

I wanted some bling so I went with 3 coats of the awesome Rescue Beauty Lounge Frugalista on all fingers except accents. I hauled this beauty in the 50% off sale last year and am now kicking myself for only purchasing 4 polishes.
Close up:

Frugalista is a gorgeous silver and purple glitter and I now know why Rescue Beauty Lounge polishes are so hyped about! The polishes are just gorgeous and it was easy to apply and quick to dry.

I then freehanded cupcakes on my accent fingers by following Rina's great cupcake tutorial. You might notice that my cupcake is in the same colour scheme as my logo! It by no means looks like the work of art Claude made for me but I tried =p I didn't even attempt the lippie and nail polish bottle as it would have been a fail haha. I am still completely in love with my logo!!
For this design I used a coat of Butter London Pink Ribbon as a sheer base. I then used China Glaze Sugar High to freehand a thick French tip and used Kiss nail art striper in white for vertical stripes to complete the cupcake liner. I then drew a large half circle on top of the cupcake liner using Ulta 3 chocolate cake and added dark red bullions to make sprinkles.

The pic above is of the design on my right hand (which I hardly show) as I actually preferred the way I did the cupcake. I got lazy with my right hand and didn't add the cherry which I did using China Glaze Empowerment. I topped it all with a coat of Coffret D’or gel mode topcoat which Christina gave me in one of our swaps. The topcoat makes my nails so lovely and shiny! I have yet to fully use it properly though.

I'm now trying to think of a mani design for my actual birthday! What would you suggest?
Thanks for looking and don't forget to enter My Big Birthday Giveaway! I'll be catching up on comments tomorrow x)
I wanted some bling so I went with 3 coats of the awesome Rescue Beauty Lounge Frugalista on all fingers except accents. I hauled this beauty in the 50% off sale last year and am now kicking myself for only purchasing 4 polishes.
Close up:
Frugalista is a gorgeous silver and purple glitter and I now know why Rescue Beauty Lounge polishes are so hyped about! The polishes are just gorgeous and it was easy to apply and quick to dry.
I then freehanded cupcakes on my accent fingers by following Rina's great cupcake tutorial. You might notice that my cupcake is in the same colour scheme as my logo! It by no means looks like the work of art Claude made for me but I tried =p I didn't even attempt the lippie and nail polish bottle as it would have been a fail haha. I am still completely in love with my logo!!
For this design I used a coat of Butter London Pink Ribbon as a sheer base. I then used China Glaze Sugar High to freehand a thick French tip and used Kiss nail art striper in white for vertical stripes to complete the cupcake liner. I then drew a large half circle on top of the cupcake liner using Ulta 3 chocolate cake and added dark red bullions to make sprinkles.
The pic above is of the design on my right hand (which I hardly show) as I actually preferred the way I did the cupcake. I got lazy with my right hand and didn't add the cherry which I did using China Glaze Empowerment. I topped it all with a coat of Coffret D’or gel mode topcoat which Christina gave me in one of our swaps. The topcoat makes my nails so lovely and shiny! I have yet to fully use it properly though.
I'm now trying to think of a mani design for my actual birthday! What would you suggest?
Thanks for looking and don't forget to enter My Big Birthday Giveaway! I'll be catching up on comments tomorrow x)
Subscribe to:
Posts (Atom)