Showing posts with label Nail stamping. Show all posts
Showing posts with label Nail stamping. Show all posts
Pink diamonds manicure
HELLO!!! How have you all been? It's been a crazy few weeks and I can't believe it's nearly halfway through May already. What the heck?!! The husband and I are off to Japan in October (SQUEEEE!) so in preparation we're doing Japanese classes which is giving the old noggin' a good workout. I started yoga classes too which I'm really enjoying and I"m trying to be more active especially as we're heading into Winter and all I want to do is vege out. I also got the AMAZING opportunity to have lunch at The Fat Duck Melbourne last week and flew down just for the day so it's been a little exhausting!
I have a very simple stamped mani today that I did a little while ago. I used 3 coats of Models Own HyperGel Pink Veneer and stamped different designs from Nailz Craze plate NC 04 using China Glaze Millennium.
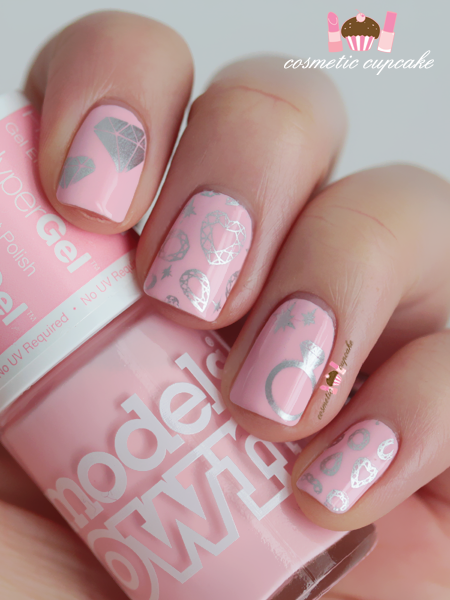
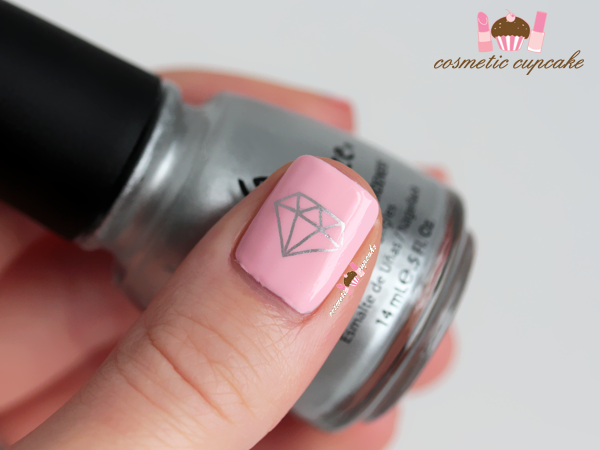
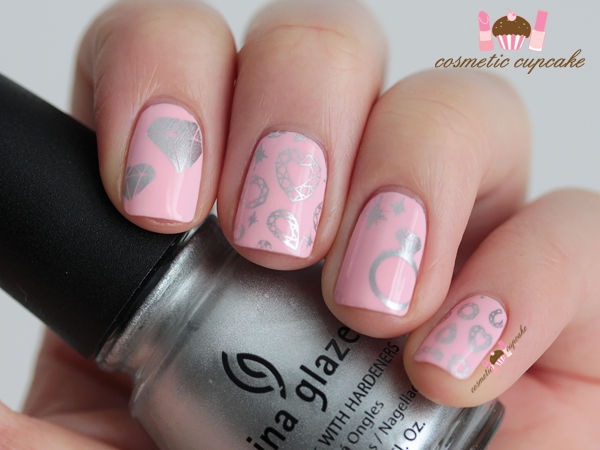
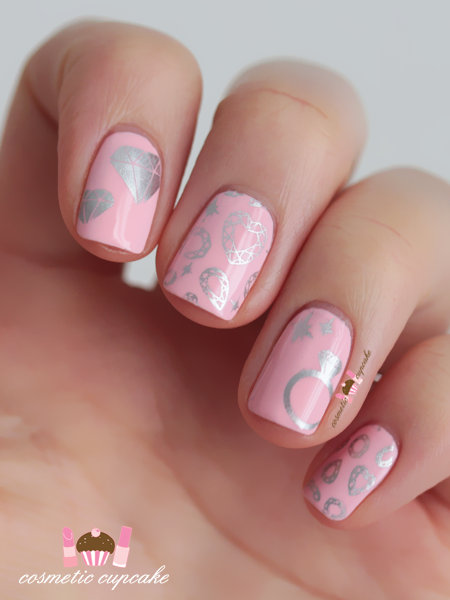
I love the Nailz Craze plates and I really wish Natalie would release more designs! They stamp so well and the designs are so cute. Who doesn't love a bit of bling right? Thanks for looking!
I have a very simple stamped mani today that I did a little while ago. I used 3 coats of Models Own HyperGel Pink Veneer and stamped different designs from Nailz Craze plate NC 04 using China Glaze Millennium.
I love the Nailz Craze plates and I really wish Natalie would release more designs! They stamp so well and the designs are so cute. Who doesn't love a bit of bling right? Thanks for looking!
Easter manicure
Happy Easter everyone! I haven't been in the mood for nails or blogging lately and I finally feel like getting back in to it so I'm back today with my Easter mani. The best thing about Easter manis is the excuse to break out the pastels! Not that one really needs any excuse for them haha. I'm pretty happy with how my nails turned out so I think I've got my mojo back!

Here's what I used:

Thumbs: I used 2 coats of Orly Snowcone as my base. For the grass I applied thin stripes of China Glaze Entourage and Nail Star two way nail art pen & brush in Green and created clouds using Cult Nails Tempest and a medium dotting tool. I finished it off by adding butterfly and dragonfly fimo.

Index finger: I used 3 coats of Models Own Speckled Eggs Dove which was a birthday present from my lovely friend Aysh. It's such a great pink and speckled polishes are so darn cute!
Middle finger: I used 2 coats of Cult Nails Tempest and freehanded the carrots using Bloom Bettina I and Kester Black Peach Melba*. For the leaves I used Revlon Parfumerie Lime Basil.

Ring finger: I used 2 coats of China Glaze Lemon Fizz and Cult Nails Tempest for the polka dots.
Pinky: I used 2 coats of Barry M Gelly and made a decal using bunny design from Bundle Monster plate BM-H10 using Konad Special Polish in white and filled in the ears using Kester Black Lilac and the eye with Cult Nails Nevermore.


I hope you're all having a lovely Easter! What are you all up to this long weekend? I've done nothing but eat so far haha. Thanks for looking as always!
* Product(s) provided to me for consideration but this in no way influenced my review in any way. As always, my reviews are my 100% honest opinion. My Disclosure Policy can be viewed here.
Here's what I used:
Thumbs: I used 2 coats of Orly Snowcone as my base. For the grass I applied thin stripes of China Glaze Entourage and Nail Star two way nail art pen & brush in Green and created clouds using Cult Nails Tempest and a medium dotting tool. I finished it off by adding butterfly and dragonfly fimo.
Index finger: I used 3 coats of Models Own Speckled Eggs Dove which was a birthday present from my lovely friend Aysh. It's such a great pink and speckled polishes are so darn cute!
Middle finger: I used 2 coats of Cult Nails Tempest and freehanded the carrots using Bloom Bettina I and Kester Black Peach Melba*. For the leaves I used Revlon Parfumerie Lime Basil.
Ring finger: I used 2 coats of China Glaze Lemon Fizz and Cult Nails Tempest for the polka dots.
Pinky: I used 2 coats of Barry M Gelly and made a decal using bunny design from Bundle Monster plate BM-H10 using Konad Special Polish in white and filled in the ears using Kester Black Lilac and the eye with Cult Nails Nevermore.
I hope you're all having a lovely Easter! What are you all up to this long weekend? I've done nothing but eat so far haha. Thanks for looking as always!
* Product(s) provided to me for consideration but this in no way influenced my review in any way. As always, my reviews are my 100% honest opinion. My Disclosure Policy can be viewed here.
Bridal lace manicure
Some quick nail art today! This is a NOTD from last month from when I went to a friend’s wedding. As always I leave doing my nails for events until the very last minute which means I am always rushing so just went for something simple. I posted a snap of this mani on Instagram and Facebook already so you might have seen it before!

I used 2 coats of Hello Darling Cakefight (which is such an appropriately named wedding shade!) and stamped butterfly looking lace design from Moyou London Bridal collection plate 07 using Konad Special polish in black. Topped it all off with a coat of Seche Vite.
Thanks for looking!
I used 2 coats of Hello Darling Cakefight (which is such an appropriately named wedding shade!) and stamped butterfly looking lace design from Moyou London Bridal collection plate 07 using Konad Special polish in black. Topped it all off with a coat of Seche Vite.
Thanks for looking!
Pastel houndstooth manicure
I've been stamping my nails since about early 2011 but I've never actually done a houndstooth manicure before can you believe?! I thought it was about time to rectify that but I went with something different from the usual black and white. Please excuse my crappy photos in this post though - I really need to get my artificial lighting situation sorted so I don't have to wait for daylight to swatch and take NOTD photos.

I applied 2 coats of Models Own HyperGel Lilac Sheen on all fingers except my ring finger where I used 2 coats of NCLA Elegantly Punk. I stamped houndstooth design from Moyou London Pro plate 07 using Konad Special polish in white and then topped them off with a coat of NCLA Party Favourite.


Thanks for looking as always!
I applied 2 coats of Models Own HyperGel Lilac Sheen on all fingers except my ring finger where I used 2 coats of NCLA Elegantly Punk. I stamped houndstooth design from Moyou London Pro plate 07 using Konad Special polish in white and then topped them off with a coat of NCLA Party Favourite.
Thanks for looking as always!
Snowflake Rudolph manicure
Another day another Christmas mani! This time with a little freehand nail art featuring everyone's favourite red nosed reindeer. For the snowflake nails I used 2 coats of one of my favourite blues Hello Darling Wading Pool (swatched here) and stamped full snowflake design from Moyou London Festive Collection plate 03 using Konad Special polish in white.
For the reindeers I used 2 coats of Cult Nails Tempest as my base and painted a semi circle for the reindeer head using Essie Hot Coco. I used China Glaze Ruby Pumps for the nose and Cult Nails Tempest for the eyes and Kiss nail art striper in black for the eyes, antlers and outline. Topped it all off with a coat of top coat!
Only a week and a bit left til Christmas eek! What are you wearing on your nails at the moment?
Moyou London candy cane manicure
A super quick post with my first Christmas mani for the year! I hauled quite a few Moyou London plates recently and I've been wanting to try them out properly and the Festive collection plates are perfect for this time of year.

I used 2 coats of Cult Nails Tempest on all fingers except for my ring finger which I used 2 coats of China Glaze Ruby Deer. I then stamped the full candy cane design from Moyou London Festive collection plate 03 using Konad Special polish in white over the red accent nail and used my new Mundo de Unas stamping polish in red over the white nails. I didn't tape my nails off before stamping the red so it left my skin looking rather pink argh! I topped it all off with a coat of essence glitter topcoat for some very subtle shimmer.

I am loving my Moyou London plates and Mundo de Unas stamping polishes and I'm trying to resist the urge to buy more plates as a present to myself! But it is waaaaaay too tempting when the designs are so awesome.. Are you rocking Christmas nails at the moment? Are there any Christmas designs you want to see?
Thanks for looking as always!
I used 2 coats of Cult Nails Tempest on all fingers except for my ring finger which I used 2 coats of China Glaze Ruby Deer. I then stamped the full candy cane design from Moyou London Festive collection plate 03 using Konad Special polish in white over the red accent nail and used my new Mundo de Unas stamping polish in red over the white nails. I didn't tape my nails off before stamping the red so it left my skin looking rather pink argh! I topped it all off with a coat of essence glitter topcoat for some very subtle shimmer.
I am loving my Moyou London plates and Mundo de Unas stamping polishes and I'm trying to resist the urge to buy more plates as a present to myself! But it is waaaaaay too tempting when the designs are so awesome.. Are you rocking Christmas nails at the moment? Are there any Christmas designs you want to see?
Thanks for looking as always!
Beach manicure
It is swelteringly hot here in Sydney at the moment and it's not even summer yet. Our place doesn't have air conditioning so I've been hiding out with all the blinds closed when not at work haha. With that in mind I thought it was time for a summery mani to go with the weather and what better way than with a beach manicure! It was a bit of a fail though because my top coat bubbled but I guess it unintentionally adds to the beach and sea theme so let's just say I did it intentionally ok!
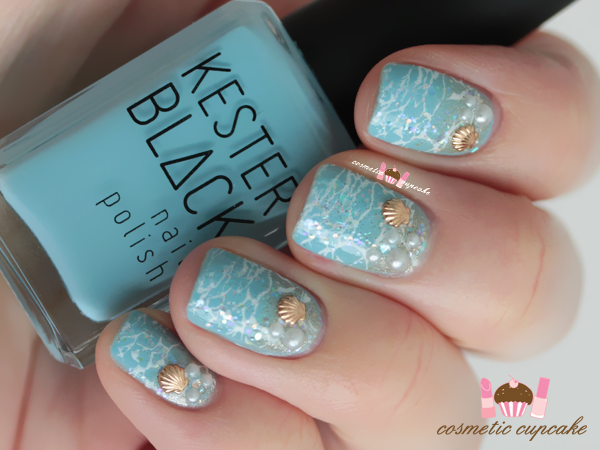
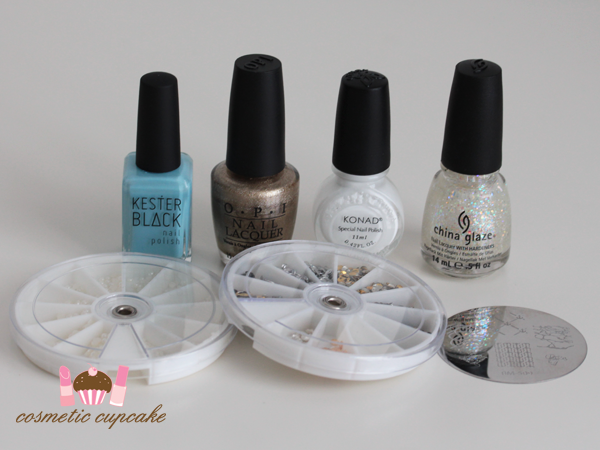
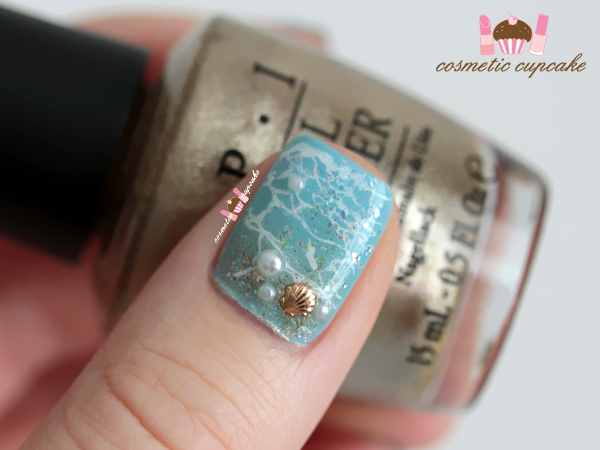
I started off with 2 coats of Kester Black Blueberry Tart* (you can see my swatch of it here) as my base and then sponged OPI Glitzerland to the base of each nail for the sand. I then stamped wave design from Bundle Monster BM-509 using Konad Special polish in white and added a coat of China Glaze Snow Globe. To finish it off I added a gold shell stud and some different sized pearls.
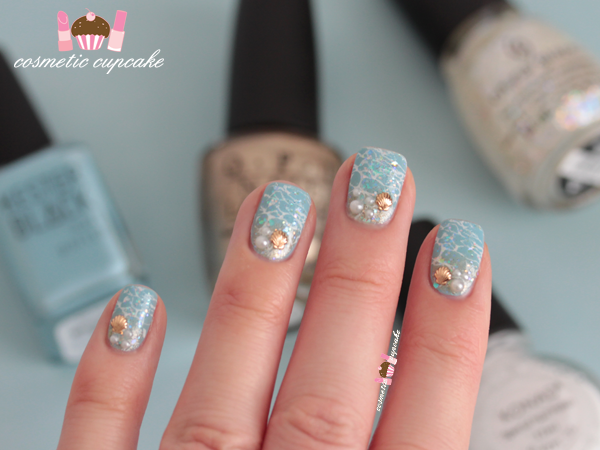
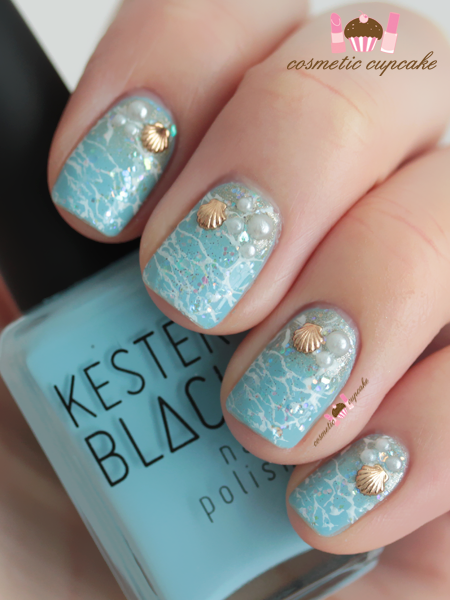
What do you think of my beach mani? Hope you're all having a fab weekend and for the Aussie girls that you stay cool! Thanks for looking as always!
* Product(s) provided to me for consideration but this in no way influenced my review in any way. As always, my reviews are my 100% honest opinion. My Disclosure Policy can be viewed here.
I started off with 2 coats of Kester Black Blueberry Tart* (you can see my swatch of it here) as my base and then sponged OPI Glitzerland to the base of each nail for the sand. I then stamped wave design from Bundle Monster BM-509 using Konad Special polish in white and added a coat of China Glaze Snow Globe. To finish it off I added a gold shell stud and some different sized pearls.
What do you think of my beach mani? Hope you're all having a fab weekend and for the Aussie girls that you stay cool! Thanks for looking as always!
* Product(s) provided to me for consideration but this in no way influenced my review in any way. As always, my reviews are my 100% honest opinion. My Disclosure Policy can be viewed here.
Romantique paisley CND Shellac manicure
I picked up a CND Shellac lamp and trial pack when I was at the Spa & Beauty Expo a few weeks ago and I finally got the chance to try it out over the weekend. The trial pack included all prep products for a CND Shellac mani and also some of CND's best selling shades including Romantique which is a gorgeous soft pink shade. It's been a while since I've done a palette cleanser mani so I thought I would go back to basics! I was going to leave it as is but I didn't like the shade on it's own on me as it shows VNL (visible nail line!) so I decided to stamp over it. Last week in class my teacher put on this great CND Shellac paisley stamping tutorial by Sarah R so I thought I'd pull out my paisely plate and create a softer version of the mani.

I prepped my nails and applied a thin coat of CND Shellac base coat and cured for 10 seconds before applying 2 coats of Romantique curing for 2 mins on each coat. Then I removed the sticky inhibition layer on all nails with IPA (isopropyl alcohol) and stamped full paisley image from Bundle Monster plate BM-315 using Konad stamping polish in white.


I then added a coat of CND Shellac top coat and cured for another 2 mins before pressing CND Additives Glitter in Sizzling Sand over the inhibition layer of each nail with a nail art brush for some gorgeous and subtle holographic sparkle. I finished off with another coat of CND Shellac top coat cured for another 2 mins and then removed the inhibition layer with IPA. PHEW!


I absolutely love how this turned out and cannot wait to experiment more with CND Shellac! I'm a bit hooked now and I'm chuffed that my first Shellac mani turned out so well! I think with a lace design or something this would be perfect look for brides. I took the long way with this mani by applying the additives at the end but oh well trial and error.
Hope you're all having a fab start to the week! x
I prepped my nails and applied a thin coat of CND Shellac base coat and cured for 10 seconds before applying 2 coats of Romantique curing for 2 mins on each coat. Then I removed the sticky inhibition layer on all nails with IPA (isopropyl alcohol) and stamped full paisley image from Bundle Monster plate BM-315 using Konad stamping polish in white.
I then added a coat of CND Shellac top coat and cured for another 2 mins before pressing CND Additives Glitter in Sizzling Sand over the inhibition layer of each nail with a nail art brush for some gorgeous and subtle holographic sparkle. I finished off with another coat of CND Shellac top coat cured for another 2 mins and then removed the inhibition layer with IPA. PHEW!
I absolutely love how this turned out and cannot wait to experiment more with CND Shellac! I'm a bit hooked now and I'm chuffed that my first Shellac mani turned out so well! I think with a lace design or something this would be perfect look for brides. I took the long way with this mani by applying the additives at the end but oh well trial and error.
Hope you're all having a fab start to the week! x
Pastels and triangles manicure
I forgot to post this mani from a few weeks ago oops! I wanted to use some of the Barry M Gelly polishes I picked up in London on my honeymoon and thought I'd do a somewhat geometric mani. It didn't really turn out how I wanted it to because my stamping for my accent nail was a huge fail and so are my photos but oh well. Bring on Summer and the long days of beautiful sunshine!

What I used:

Pinky and thumb: I used 2 coats of Barry M Huckleberry and added black studs in a triangular design to the middle and bottom of my nails.
Ring finger: I used 1 coat of Cult Nails Tempest and stamped triangular design from Bundle Monster BM 402 using Konad special polish in black.
Middle finger: I used 3 coats of Essie Ignite the Night (thanks to my sis for this glitter!)
Index finger: I used 2 coats of Barry M Rose Hip and added black studs in a triangular design at the top of my nail.

I find I need to stamp regularly or else I lose my skills and end up with major fails! I also need to update my stamping collection too and get some Moyou plates and also indie plates. Any recommendations?? Thanks for looking as always!
What I used:
Pinky and thumb: I used 2 coats of Barry M Huckleberry and added black studs in a triangular design to the middle and bottom of my nails.
Ring finger: I used 1 coat of Cult Nails Tempest and stamped triangular design from Bundle Monster BM 402 using Konad special polish in black.
Middle finger: I used 3 coats of Essie Ignite the Night (thanks to my sis for this glitter!)
Index finger: I used 2 coats of Barry M Rose Hip and added black studs in a triangular design at the top of my nail.
I find I need to stamp regularly or else I lose my skills and end up with major fails! I also need to update my stamping collection too and get some Moyou plates and also indie plates. Any recommendations?? Thanks for looking as always!
Red and white sweater manicure
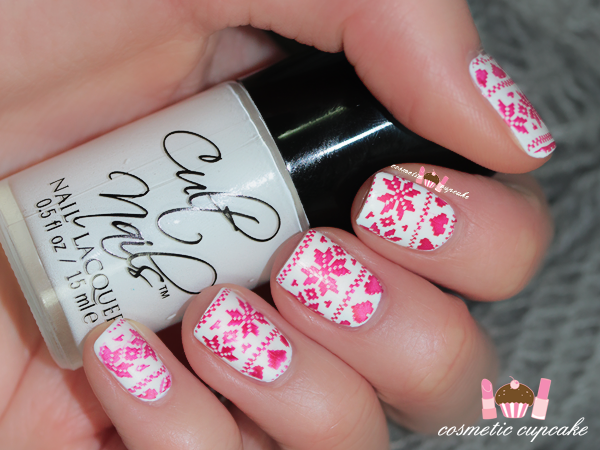
It's cold and rainy in Sydney tonight which is the ideal weather for a lazy night in on the couch. It's also the weather for a sweater manicure! I haven't polished my nails in like 3 weeks and when I don't have time I like to do a tried and tested mani and the cheats way is to stamp. I did this exact same combo when I first hauled my Nailz Craze plates but I never posted it on my blog so it was time to recreate the mani!
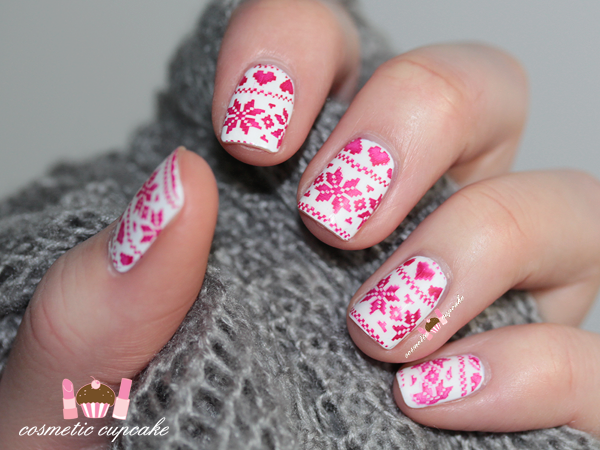
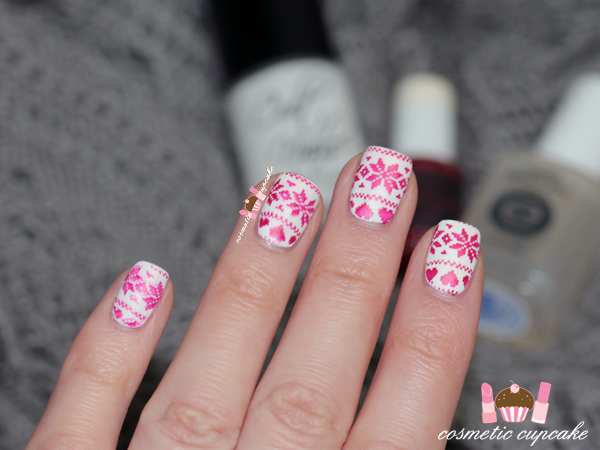
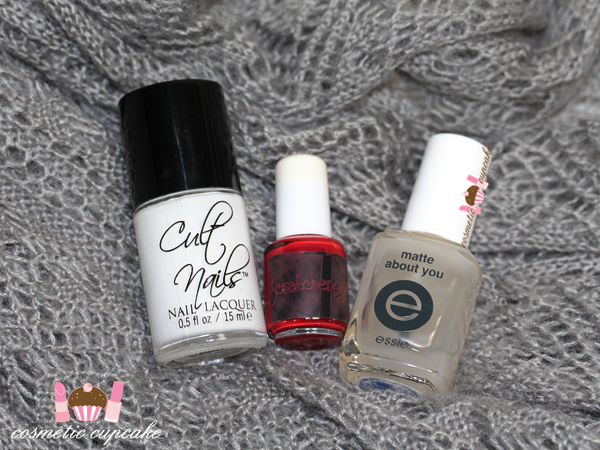
I used 2 coats of Cult Nails Tempest as my base and stamped sweater design from Nailz Craze plate NC03 using Scratchers Iron Red stamping polish. I decided to mattify it and and covered it all in a coat of Essie Matte About You. It's by far my favourite matte topcoat but my bottle is soooooooo old I had to I had to add a few drops of Seche Restore to it haha. I think it's about time for a new bottle oops!
I hope you're all having a fab weekend so far! Thanks for looking as always and don't forget to enter my last belated 4th blogiversary giveaway here!
I used 2 coats of Cult Nails Tempest as my base and stamped sweater design from Nailz Craze plate NC03 using Scratchers Iron Red stamping polish. I decided to mattify it and and covered it all in a coat of Essie Matte About You. It's by far my favourite matte topcoat but my bottle is soooooooo old I had to I had to add a few drops of Seche Restore to it haha. I think it's about time for a new bottle oops!
I hope you're all having a fab weekend so far! Thanks for looking as always and don't forget to enter my last belated 4th blogiversary giveaway here!
Birthday manicure
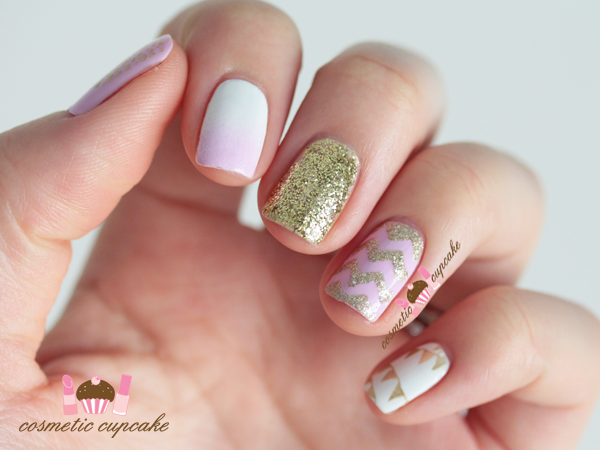
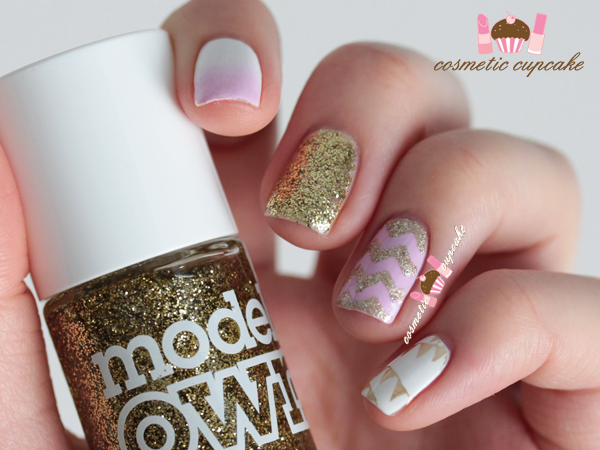
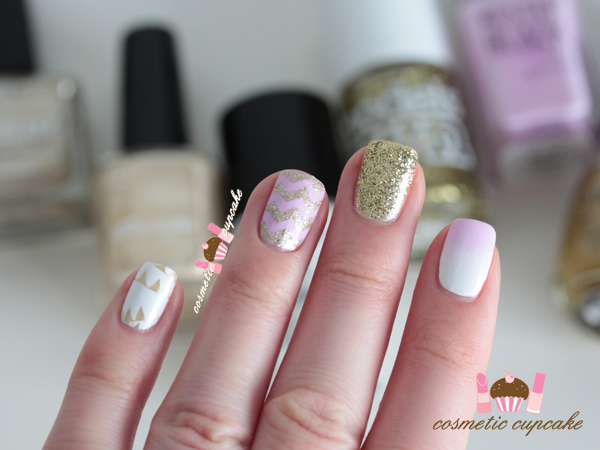
Soooooo I am officially another year older! Not sure if I'm really wiser though haha. I got spoiled by the hubby this weekend and had a lovely lunch in the mountains and basically spent most of the time eating! I did a simple birthday mani because I had no idea what I wanted but had to have some gold glitter in the mix!
What I used:
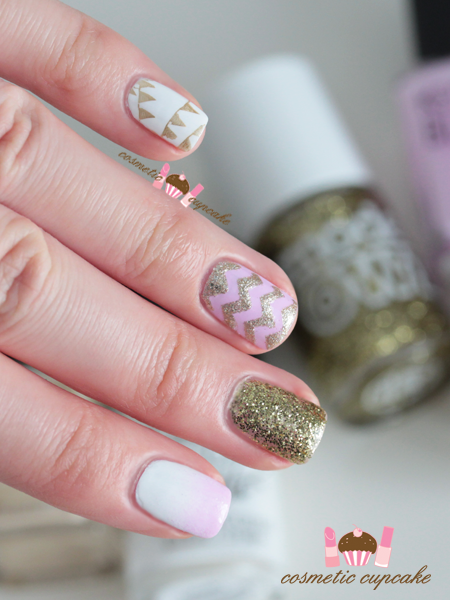
Pinky: 2 coats of Cult Nails Tempest and added bunting using Bundle Monster BM-H19 using China Glaze Passion.
Ring finger: I used 2 coats of Kester Black Fairy Floss* and created the chevrons using Nail Vinyls and Face of Australia Midnight Fireworks*.
Middle finger: I used 1 coat of Face of Australia Calypso Gold* and 2 coats of Models Own Gold Finger.
Index finger: I used 2 coats of Cult Nails Tempest and sponged Kester Black Fairy Floss* to the tip for a subtle fade.
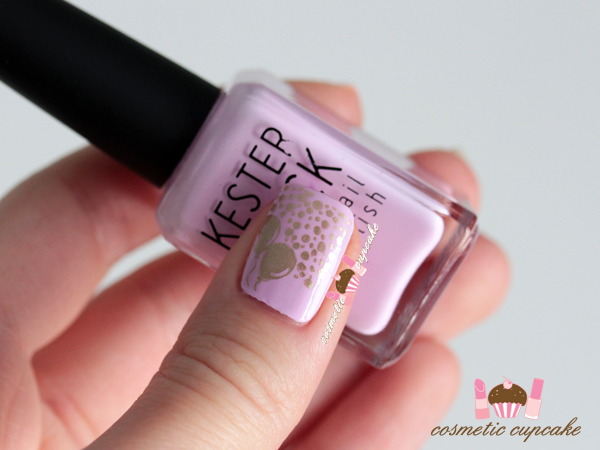
Thumb: I used 2 coats of Kester Black Fairy Floss* and stamped balloon design from Bundle Monster BM-H20 using China Glaze Passion.
I have a love hate relationship with birthdays - I love the fun aspect of them but the whole growing older thing not so much haha. What do you guys get up to on your birthdays?
I hope you all had a lovely weekend! Thanks for looking as always =)
* Product(s) provided to me for consideration but this in no way influenced my review in any way. As always, my reviews are my 100% honest opinion. My Disclosure Policy can be viewed here.
What I used:
Pinky: 2 coats of Cult Nails Tempest and added bunting using Bundle Monster BM-H19 using China Glaze Passion.
Ring finger: I used 2 coats of Kester Black Fairy Floss* and created the chevrons using Nail Vinyls and Face of Australia Midnight Fireworks*.
Middle finger: I used 1 coat of Face of Australia Calypso Gold* and 2 coats of Models Own Gold Finger.
Index finger: I used 2 coats of Cult Nails Tempest and sponged Kester Black Fairy Floss* to the tip for a subtle fade.
Thumb: I used 2 coats of Kester Black Fairy Floss* and stamped balloon design from Bundle Monster BM-H20 using China Glaze Passion.
I have a love hate relationship with birthdays - I love the fun aspect of them but the whole growing older thing not so much haha. What do you guys get up to on your birthdays?
I hope you all had a lovely weekend! Thanks for looking as always =)
* Product(s) provided to me for consideration but this in no way influenced my review in any way. As always, my reviews are my 100% honest opinion. My Disclosure Policy can be viewed here.
Turquoise splatter inspired manicure
Sooooooooo this manicure is inspired by my favourite Samantha Wills Bohemian Bardot ring in turquoise gunmetal. Unfortunately it was a fail so it's a VERY loosely inspired manicure! I probably should have used a lighter shade to stamp with and also because it's not really a splatter design AT ALL but once I'd started I couldn't be bothered to take it all off and do it again LOL. Oh well!

I used 2 coats of Hema Long Lasting in 81 and stamped the splatter design from Konad plate m70 using Konad Special polish in black.


It was still a fun mani to rock with my gorgeous ring but not the exact look I was after!! Thanks for looking as always!
I used 2 coats of Hema Long Lasting in 81 and stamped the splatter design from Konad plate m70 using Konad Special polish in black.
It was still a fun mani to rock with my gorgeous ring but not the exact look I was after!! Thanks for looking as always!
Skulls and studs manicure
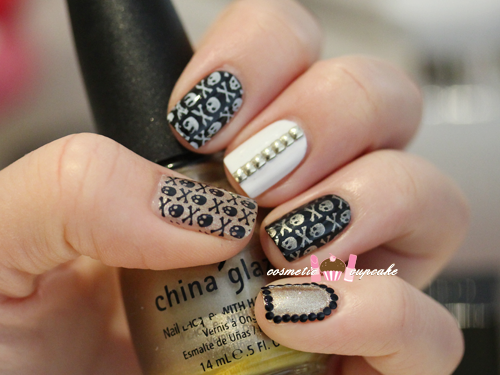
Happy New Year everyone!!! Can you believe it's 2013 already??? OMG! I hope you all had a fabulous Xmas and NYE =) The last few weeks have been absolutely mad hence the lack of posts but I've finally got a new post for you today. I recently hauled some indie items which included a few products from Vivid Lacquer. I was excited to get my hands on the stamping plate VL 001 which has a full skull image (so I can do manis for my skull loving friends Anita and Ange!) and other cute designs too. This mani doubled as my NYE mani as I didn't get time to do my nails doh!

What I used:
Thumb: I used 2 coats of OPI Glitzerland and Konad Special polish in black to stamp.
Index: I used 2 coats of Ulta 3 Black Satin and Konad Special polish in white to stamp.

Middle finger: I used 2 coats of OPI Alpine Snow and added 2mm square gold studs down the centre.
Ring finger: I used 2 coats of Ulta 3 Black Satin and I used China Glaze Passion to stamp.
Pinky: I used 2 coats of China Glaze Midnight Kiss as my base and added 1.5mm black round studs for a studded framed nail.


I treated myself to a new DSLR and macro lens for Xmas and I'm still getting used to it so my pics will be a bit all over the shop for the time being! Bear with me lol. I hope you're all having a fantastic start to the year! Thanks for looking as always =)
What I used:
Thumb: I used 2 coats of OPI Glitzerland and Konad Special polish in black to stamp.
Index: I used 2 coats of Ulta 3 Black Satin and Konad Special polish in white to stamp.
Middle finger: I used 2 coats of OPI Alpine Snow and added 2mm square gold studs down the centre.
Ring finger: I used 2 coats of Ulta 3 Black Satin and I used China Glaze Passion to stamp.
Pinky: I used 2 coats of China Glaze Midnight Kiss as my base and added 1.5mm black round studs for a studded framed nail.
I treated myself to a new DSLR and macro lens for Xmas and I'm still getting used to it so my pics will be a bit all over the shop for the time being! Bear with me lol. I hope you're all having a fantastic start to the year! Thanks for looking as always =)
Subscribe to:
Posts (Atom)